Coshopping - Steps to enable in WCS 7 Developer
Coshopping uses the WebSphere Application Server Communications Enabled Applications (CEA) Feature Pack and CEA peer-to-peer web collaboration widgets to synchronize each browser to the web page of the initializing shopper.
Step 1 :Installing Feature Pack 2 or later
Install WebSphere Commerce Version 7 Feature Pack 2 or later, which installs the coshopping feature.
Step 2 : Enable starter store enhancements
Run the enablement scripts for starter store enhancements.
Step 3 : Download Websphere Application Server Feature Pack for CEA
The Feature Pack can be downloaded from the below link :
http://www-01.ibm.com/software/webservers/appserv/was/featurepacks/cea/
You will need Passport Advantage credentials to download the Feature Pack
This feature pack is one of the first WebSphere Application Server products to be installed by Installation Manager rather than by the programs based on InstallShield MultiPlatform (ISMP) that are used to install, update, and uninstall previous versions of WebSphere Application Server.
Once download is complete , extract the zip file and add the repository to the IIM (IBM Installation Manager).
File -> Preferences -> Repositories -> Add Repository..
The path of the repostory will be something similar to below :
<temp_directory>\cea_and_import_repositories\local-repositories\repository.config
Step 4 : Upgrade the WebSphere Application Server to Fix pack 17 and above
Important to note - whenever you apply Fix packs to the Websphere Application Server , be sure to apply the same level of fix pack to the Java SDK as well. If there are any mismatches , we will face issues while importing or synchronizing the Websphere Application installation into the Installation Manager.
You can choose to upgrade the WAS fix pack level using either Installation Manager or using Update Installer.
If using Update installer , the installation URL :
I had already upgraded the Websphere Application Test Server to 7.0.0.19 at the time of WCS 7 installation so I did not need to do this.
Optional: If you ever want to install a seperate instance of WAS
Download URL :
PartNumber : C1G0QML.zip
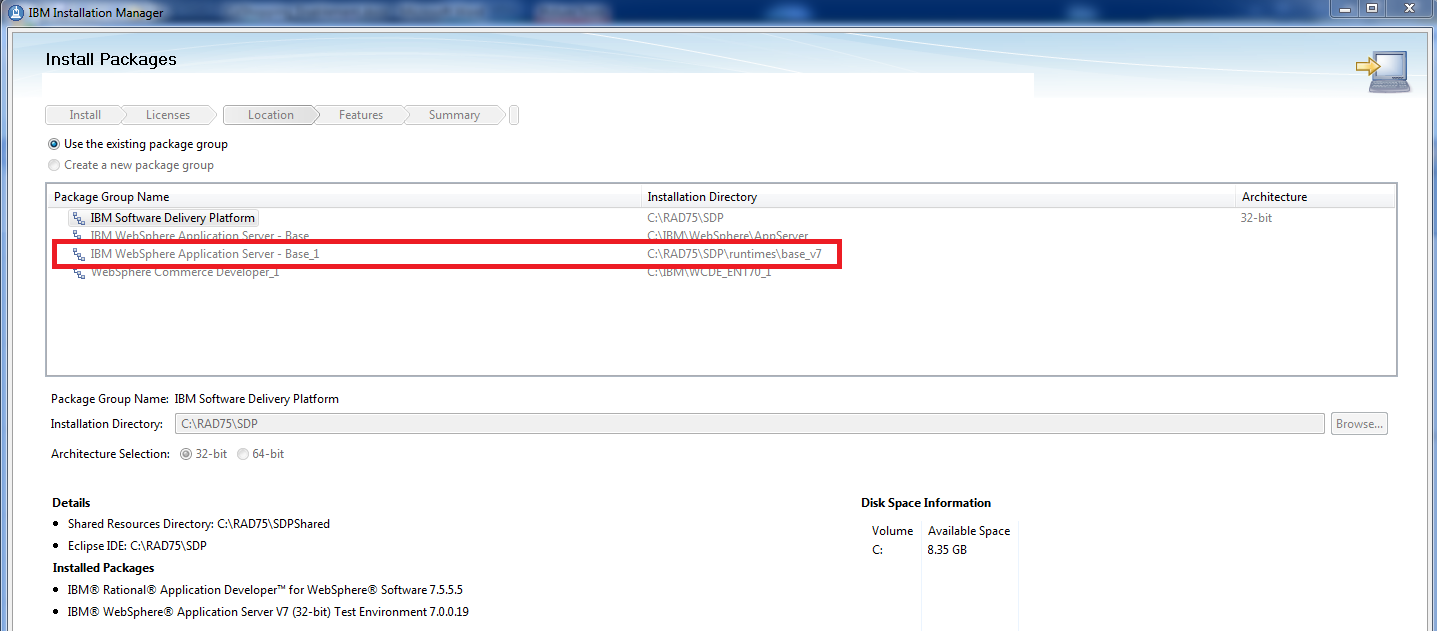
Step 5 : Import the existing installation of the WebSphere Application Test Server into the IIM
1.
Open IIM
2.
Select "Import"
3.
Enter/Browse the Installation Directory of the Websphere
Application Test Server. The path will be -RAD_installdir\runtimes\base_v7\
and follow the steps and import.
4.
The Websphere Application Test Server will be imported and
now we can apply the Feature Packs to the installation using IIM. It will start
appearing in the PackageGroup listings -

Step 6 : Install the CEA Feature Pack for Websphere Application Server 7
1.
Open IIM
2.
Select "Install"
3.
Select the packagename imported in step 5 and follow the GUI
steps to install the feature pack 1.0.0.0
Step 7 : Update the CEA Feature Pack installed to version
1.0.0.1 or above
The latest version available is 1.0.0.11 and hence I installed
the same.
Use the "Update" menu within the IIM to perform the
activity
When you have finished the installation and upgrade, you need to
create a WebSphere Application Server runtime environment that includes the
feature pack's functions. We will augment the existing WAS profile.
Step 8 : Create a WebSphere Application Server runtime
environment that includes the feature pack's functions
Augment the WebSphere Application Server profile.
a.
Open a command line.
b.
Go to the RAD_installdir\runtimes\base_v7\bin directory.
c.
Determine your profileName. To find a list of
possible profileName options, manageprofiles.bat -listProfiles
This
command returns a list of the profileNameoptions that can be
augmented. select the WebSphere Application profile.
d.
Backup the existing profile before augmenting
manageprofiles.bat -backupProfile -profileName profileName -backupFile
<path of the backup zip>
e.
Run the manageprofiles command:
manageprofiles.bat -augment -profileName profileName -templatePath ..\profileTemplates\CEA\default.ceafep
manageprofiles.bat -augment -profileName profileName -templatePath ..\profileTemplates\CEA\default.ceafep
f.
If something goes wrong , either restore the backup profile (the
backup taken in Step 8d) or use the "unaugment" option to undo
the augmentation
manageprofiles.bat -unaugment -profileName profileName -ignoreStack -templatePath ..\profileTemplates\CEA\default.ceafep
OR
manageprofiles -restoreProfile -backupFile <path of the backup zip>
manageprofiles.bat -unaugment -profileName profileName -ignoreStack -templatePath ..\profileTemplates\CEA\default.ceafep
OR
manageprofiles -restoreProfile -backupFile <path of the backup zip>
Step 9: Configure the WebSphere Commerce test server:
a.
Open the WebSphere Application Server Administrative Console.
b.
Click Servers > Server Type > WebSphere
Application Server > server1 > Communications Enabled
Applications (CEA)
c.
Select Enable communications service.
d.
Change Virtual Host to WC_default_host, Click OK,
and save the configuration.
e.
Click Environment > Virtual hosts > WC_default_host > Host
Alias. Add the port for theSIP_DEFAULTHOST to the Virtual host.
Ensure that a fully qualified domain name is used. You can check what the ports
are for the SIP_DEFAULTHOST by selecting Servers > Server
Type > WebSphere Application Server > server_name > Ports.
Step 10: Integrate the CEA dojo library with the
WebSphere Commerce EAR file.
a.
Stop the WebSphere Application test server.
b.
Close the WebSphere Commerce development environment.
c.
Go to WCDE_installdir\bin directory.
d.
Run the setupCoshopping.bat command.
Publish the Madisons.sar store archive.
In Management Center, select the coshopping store function to
add coshopping to the Madisons starter store storefront.
In the Madisons starter store, use two different browsers to
simulate a coshopping session.
Enjoy this amazing feature!
Please feel free to drop comments incase you need any help with
the steps.